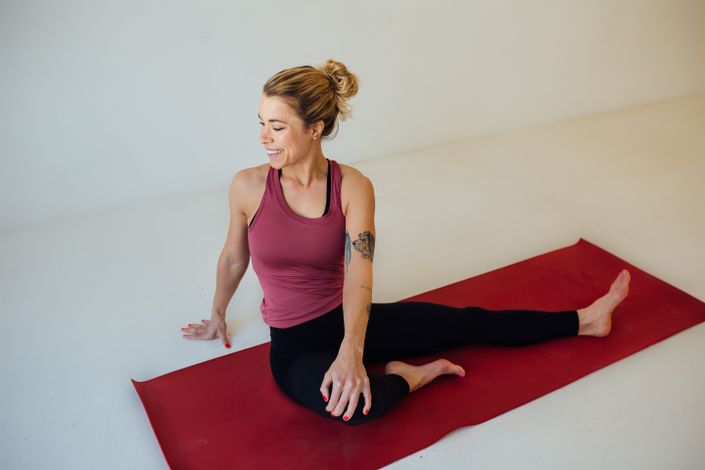
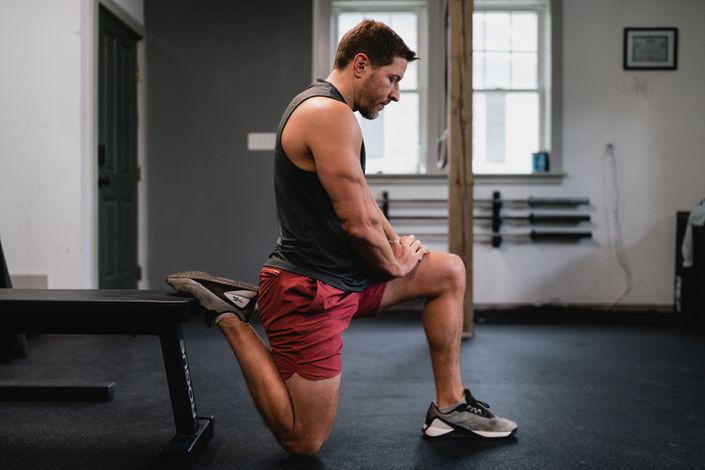
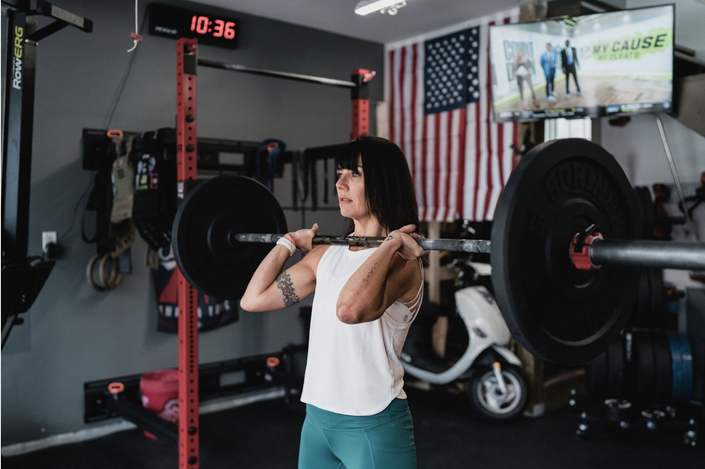
Are you frustrated with a painful low back that limits your movement, squat mechanics, or daily life? Or annoying, recurring discomfort that flares up after workouts?
It's estimated that approximately 80% of the population struggles with low back pain at some point in their lives. Even more frustrating: many peoples' pain is "non-specific", meaning there's no obvious mechanical issue that's causing it! Back pain is a complex issue, and so it requires a nuanced approach that goes beyond just "stretching it out" or "strengthening the core".
This course is for you if:
- you have recurring low pain
- certain movements predictably cause flare-ups
- are unsure how to "engage your core"
- don't know how to maintain appropriate mobility
- deal with chronic stiffness or feel limited in your range of motion
- stretching provides temporary relief, but doesn't solve the issue for good
- poor low back function is limiting you in your workouts
- go through cycles of tissue irritation that come and go
- need better tools to improve post-workout recovery
- want to maintain low back health post-injury
Curious as to what to expect from this program? Here are the details.
- an average of 15-25 minutes of exercises/ day, 4-week program
- easy-to-complete movements: simply follow along with videos of each exercise
- a science-informed approach to build strength safely and gradually
- learn to move efficiently and improve your movement mechanics
- targeted myofascial release to alleviate common tension spots, aid recovery, boost tissue hydration and improve range of motion
- built-in guided recovery and relaxation: low back pain often includes nervous system factors that also need to be addressed!
- lifetime access: work through the program at your own pace, and return to your favorite techniques as needed to maintain your low back health
While you are not required to purchase any equipment, you'll find it easier (and more pleasant) to complete the exercises with a few pieces of inexpensive gear to hand. We recommend having:
- a pair of yoga blocks
- a blanket or large beach towel
- a pair of myofascial release balls (we love Rad Roller!)
- a yoga mat: not strictly necessarily, but can be helpful to get more comfortable
- enough floor space to lie down, and a little bit of clear wall space

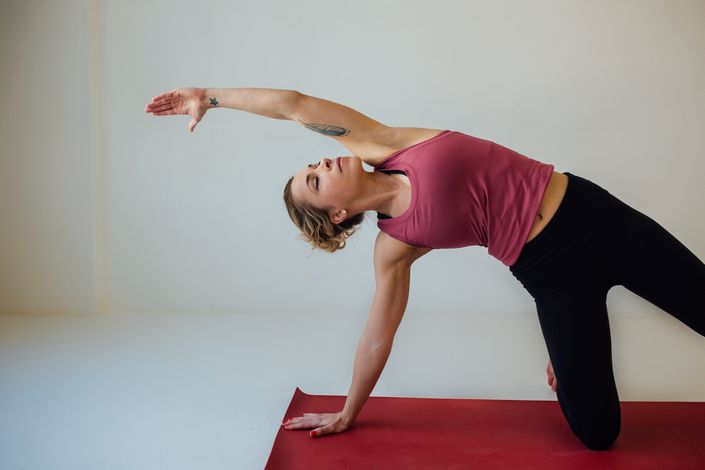
Example Curriculum
- Day 1, Exercise 1: Core//General Mobility & Stability: Thoracolumbar Fascia Myofascial Release (3:48)
- Day 1, Exercise 2: Core//General Mobility & Stability: Mellow Seated Spine Flow (16:01)
- Day 1, Exercise 3: Core//General Mobility & Stability: Transverse Abdominus Activation (9:18)
- Day 2, Exercise 1: Lateral Hip//QL: Gluteus Medius Myofascial Release (At Wall) (6:53)
- Day 2, Exercise 2: Lateral Hip//QL: Standing Gluteus Medius Hip Abduction (3:49)
- Day 2, Exercise 3: Lateral Hip//QL: Mellow Hip & Spine Release (10:25)
- Day 3, Exercise 1: Adductors & Core: 3D Hip Awareness (10:26)
- Day 3, Exercise 2: Adductors & Core: Myofascial Release - Adductors and Pectineus (10:16)
- Day 3, Exercise 3: Adductors & Core: Side-Lying Adductor Activation (9:48)
- Day 4, Exercise 1: Posterior Hip: Gluteus Maximus Myofascial Release (4:55)
- Day 4, Exercise 2: Posterior Hip: Single Leg Glute Bridge (5:15)
- Day 4, Exercise 3: Posterior Hip: Eccentric Hamstrings - Pyramid Pose (6:02)
- Day 5, Exercise 1: General Function//Thoracic Mobility: Seated Bird-Dog (6:21)
- Day 5, Exercise 2: General Function//Thoracic Mobility: Segmental Control and Lumbar Cat/Cow (6:35)
- Day 5, Exercise 3: General Function//Thoracic Mobility: Passive Thoracic Extension (7:45)
- Day 6, Exercise 1: Anterior Hip & Dynamic Movement: Cross-Body Adduction (7:21)
- Day 6, Exercise 2: Anterior Hip & Dynamic Movement: Split Stance Knee Dips (5:20)
- Day 6, Exercise 3: Anterior Hip & Dynamic Movement: Supine Quad & Hip Flexor Stretch (4:34)
- Day 7, Exercise 1: Rest & Relaxation: Body Scan (14:47)
- Day 1, Exercise 1: Core//General Mobility & Stability: Lumbar Extensor Myofascial Release At Wall (4:55)
- Day 1, Exercise 2: Core//General Mobility & Stability: Energizing Standing Spine Flow (7:12)
- Day 1, Exercise 3: Core//General Mobility & Stability: Active Transverse Abdominus Twists (7:29)
- Day 2, Exercise 1: Lateral Hip//QL: Quadratus Lumborum Myofascial Release (6:42)
- Day 2, Exercise 2: Lateral Hip//QL: Quadratus Lumborum Side Crunches (6:11)
- Day 2, Exercise 3: Lateral Hip//QL: Lateral Lumbopelvic Stability (6:37)
- Day 3, Exercise 1: Adductors & Core: Adductor Myofascial Release (Foam Roller) (7:22)
- Day 3, Exercise 2: Adductors & Core: Mellow Adductor Flow (4:53)
- Day 3, Exercise 3: Adductors & Core: Adductor Strength (4:11)
- Day 4, Exercise 1: Posterior Hip: Posterior Hip Myofascial Release (At Wall) (5:24)
- Day 4, Exercise 2: Posterior Hip: Glute Bridge Plus (7:21)
- Day 4, Exercise 3: Posterior Hip: Hip External Rotation, A Little Bit of Load (4:53)
- Day 5, Exercise 1: General Function//Thoracic Mobility: Lumbar Support - Glutes & Lats (Seated) (6:56)
- Day 5, Exercise 2: General Function//Thoracic Mobility: Thoracic Extension (4:24)
- Day 5, Exercise 3: General Function//Thoracic Mobility: Thoracic Rotation In Lunge 1 (6:21)
- Day 6, Exercise 1: Anterior Hip & Dynamic Movement: Vastus Lateralis Myofascial Release (11:42)
- Day 6, Exercise 2: Anterior Hip & Dynamic Movement: Cat Cow + (7:57)
- Day 6, Exercise 3: Anterior Hip & Dynamic Movement: Psoas & Glutes (8:39)
- Day 7, Exercise 1: Rest & Relaxation: Nervous System Recovery - Lengthening Exhale (10:39)
- Day 1, Exercise 1: Core//General Mobility & Stability: Pelvic Clock - Supine (10:10)
- Day 1, Exercise 2: Core//General Mobility & Stability: Core in Pyramid & Triangle (8:55)
- Day 1, Exercise 3: Core//General Mobility & Stability: Core & Legs Coordination for Lumbar Support (11:13)
- Day 2, Exercise 1: Lateral Hip//QL: Gluteus Medius Myofascial Release (Side-Lying) (6:25)
- Day 2, Exercise 2: Lateral Hip//QL: Side-Lying Gluteus Medius Leg Raise (9:24)
- Day 2, Exercise 3: Lateral Hip//QL: Quadratus Lumborum and Obliques (11:33)
- Day 3, Exercise 1: Adductors & Core: Eccentric Adductors, a Little Bit of Resistance (9:29)
- Day 3, Exercise 2: Adductors & Core: Adductor Strength for Squatting (5:25)
- Day 3, Exercise 3: Adductors & Core: Supta Baddha Konasana (13:02)
- Day 4, Exercise 1: Posterior Hip: Hamstrings Myofascial Release (Seated) (8:29)
- Day 4, Exercise 2: Posterior Hip: Hamstring Strength - Active Half Splits (6:44)
- Day 4, Exercise 3: Posterior Hip: Hip External Rotation, A Little Bit More Load (9:55)
- Day 5, Exercise 1: General Function//Thoracic Mobility: Upper Trapezius & Rhomboids Myofascial Release (9:12)
- Day 5, Exercise 2: General Function//Thoracic Mobility: Thoracic Rotation in Lunge 2 (6:52)
- Day 5, Exercise 3: General Function//Thoracic Mobility: Lumbar Support - Glutes & Lats (12:45)
- Day 6, Exercise 1: Anterior Hip & Dynamic Movement: Iliacus Myofascial Release (10:41)
- Day 6, Exercise 2: Anterior Hip & Dynamic Movement: Cat Cow ++ (9:20)
- Day 6, Exercise 3: Anterior Hip & Dynamic Movement: Eccentric Psoas Strength on Block (6:14)
- Day 7, Exercise 1: Rest & Relaxation: 3-Part Breath Meditation (9:20)
- Day 1, Exercise 1: Core//General Mobility & Stability: Sacroiliac Reset (5:34)
- Day 1, Exercise 2: Core//General Mobility & Stability: Core Activation - Parighasana (6:34)
- Day 1, Exercise 3: Core//General Mobility & Stability: Flowing Movement For Core Support 2 (9:39)
- Day 2, Exercise 1: Lateral Hip//QL: Squishy Surface Hip Stability Challenge (11:01)
- Day 2, Exercise 2: Lateral Hip//QL: Quadratus Lumborum and Obliques (11:33)
- Day 2, Exercise 3: Lateral Hip//QL: Cat Pulling Its Tail (11:48)
- Day 3, Exercise 1: Adductors & Core: Piriformis Myofascial Release (7:42)
- Day 3, Exercise 2: Adductors & Core: Dynamic Hip Co-Contraction & Coordination (11:25)
- Day 3, Exercise 3: Adductors & Core: Adductor Bridge Lifts (5:44)
- Day 4, Exercise 1: Posterior Hip: Myofascial Release - Hamstrings (5:33)
- Day 4, Exercise 2: Posterior Hip: Posterior Chain - Hip Extension & Hamstring Curls (4:45)
- Day 4, Exercise 3: Posterior Hip: Glutes & Hammies - Warrior 3 & Crane (4:58)
- Day 5, Exercise 1: General Function//Thoracic Mobility: Kneeling Thoracic Rotation (6:35)
- Day 5, Exercise 2: General Function//Thoracic Mobility: Thoracic Mobility Flow (14:12)
- Day 5, Exercise 3: General Function//Thoracic Mobility: Diagonal Dead Bug (8:01)
- Day 6, Exercise 1: Anterior Hip & Dynamic Movement: Low Back Stabilization Flow (16:56)
- Day 6, Exercise 2: Anterior Hip & Dynamic Movement: Camel Quad Burn (6:39)
- Day 6, Exercise 3: Anterior Hip & Dynamic Movement: Prone Lumbar Release (7:14)
- Day 7, Exercise 1: Rest & Relaxation: Legs Up The Wall (14:17)
Psst! Have you been in pain for a while? Or maybe you've already tried everything, and nothing has worked so far?
We get it: low back pain is often an ongoing struggle, with daily fluctuations that may or may or may not follow a predictable pattern. The frustration that comes with constant pain or recurring flare-ups is very real.
Because of the multitude of factors that can contribute to low back pain, you may need a more comprehensive or individualized approach. If this sounds like you, consider:
- our Bespoke programming. A custom program, built from scratch around your needs, movement goals and schedule. Includes as much daily interaction and support as needed.
- our 12-week low back pain program, designed to safely and gradually improve strength. Perfect for those with more serious pain, or athletes needing to build long-term capacity to withstand high load training and repetitive movement.
- combine this program with one of our other programs! If you have chronic stiffness in your neck, shoulders and upper back, it might be that. your entire spine could use some help. Check out our Upper Body Tension Relief and Shoulder Health Basics programs for more help with these areas.
Click below to view these complementary programs to support your wellbeing.
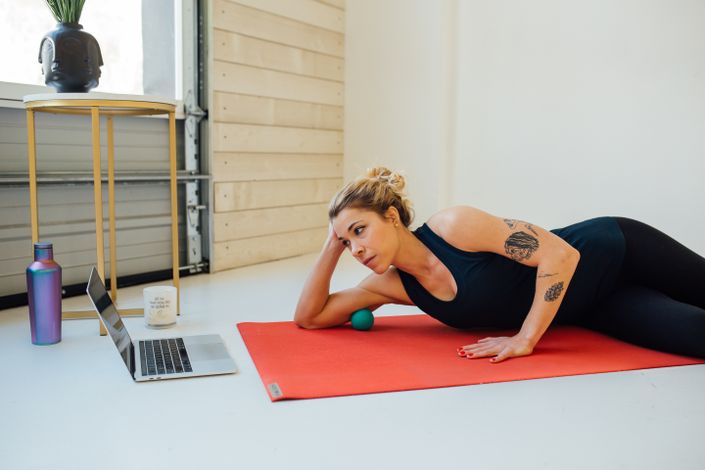
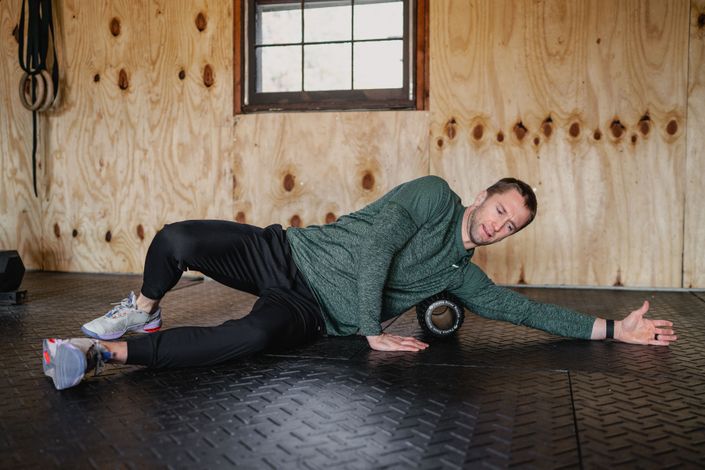
A little bit about myofascial release
Myofascial release is a safe and pleasant technique that we love including in our programs! Myofascial release:
- is an excellent way to maintain range of motion and tissue health
- boost muscle recovery and increase hydration
- provides a wonderful opportunity for nervous system recovery- a crucial part of our overall wellbeing, ability to move well and feel good in your body
- can act as both a pre-workout warmup or cool down, making it a versatile tool to have in your mobility maintenance toolkit
- equips you with personalized techniques to maintain tissue health well beyond the end of your program
Our programs are proud to exclusively use RadRoller myofascial release tools- we’ve found these to be the most versatile and high quality implements out there. With a variety of sizes and degrees of firmness to choose from, you can select something that will work for your unique body. Additionally, all RadRoller tools have a pleasant anti-slip surface that makes it easy to keep the tools in place. Plus, you'll get a discount on your purchase when you shop using the above link!
For recovery purposes, we recommend the Recovery Rounds, which have a nice amount of give to them, making for a gentler and more relaxing experience. We also love the classic Rad Roller- perfect for common tension spots around the neck, shoulders and upper back.


Meet your instructor!
Jenni Tarma is a lifelong athlete, endurance runner, RRCA Endurance coach, CrossFit athlete and CF- L1 trainer, and a full-time yoga teacher. She specializes in working with an active population and coaches everyone from elite athletes to casual weekend golfers and hikers looking to feel better in their bodies. She has multiple advanced certifications in anatomy, physiology and biomechanics, and is a lead teacher in the Carolina Yoga 200hr teacher training program, where she has mentored dozens of new yoga teachers. She is also a senior teacher in the Yoga Medicine 500hr program, and has created continuing education courses on teaching yoga to athletes for the YM community.
She is an enthusiastic writer who has contributed articles to Yoga Journal, Healthline, Weight Watchers, OpenFit, Reebok and Yoga Medicine®’s online forum among others, and recently released an e-book on hamstring tendon injuries.
Having worked with countless athletes and active folks, she has seen first hand how debilitating and frustrating low back pain can be. Her comprehensive approach to working with pain builds not only long-term resilience and function, but also seeks to addresses the nervous system factors often associated with low back pain.
Jenni and the Kaari team are excited to work with you! We can't wait to help you move and feel your best.
Not quite what you were looking for?
Check out some of our other programs below. Better yet, drop us a line to let us know what resources you'd like to support your well-being, recovery, mobility and injury-prevention needs. Email jenni@kaariprehab.com with your wishlist and we'll see what we can do!